
%20(2).avif)
%20transparent.avif)

Run Z-Image without a complex manual ComfyUI setup
This guide explains how to run Alibaba’s Z-Image workflow inside Promptus, providing a streamlined, no-code experience for ComfyUI users. Whether you are using the Promptus Web interface or the Desktop App, follow these steps to master high-performance image generation.
📋 1. Prerequisites
Before you start, ensure your environment meets these requirements:
- App: Latest version of Promptus.
- Hardware: 12–16GB VRAM GPU recommended (Quantized GGUF versions can run on 4GB VRAM).
- Automation: Promptus automatically handles workflow loading, model downloading, and file management so you can focus on creating.

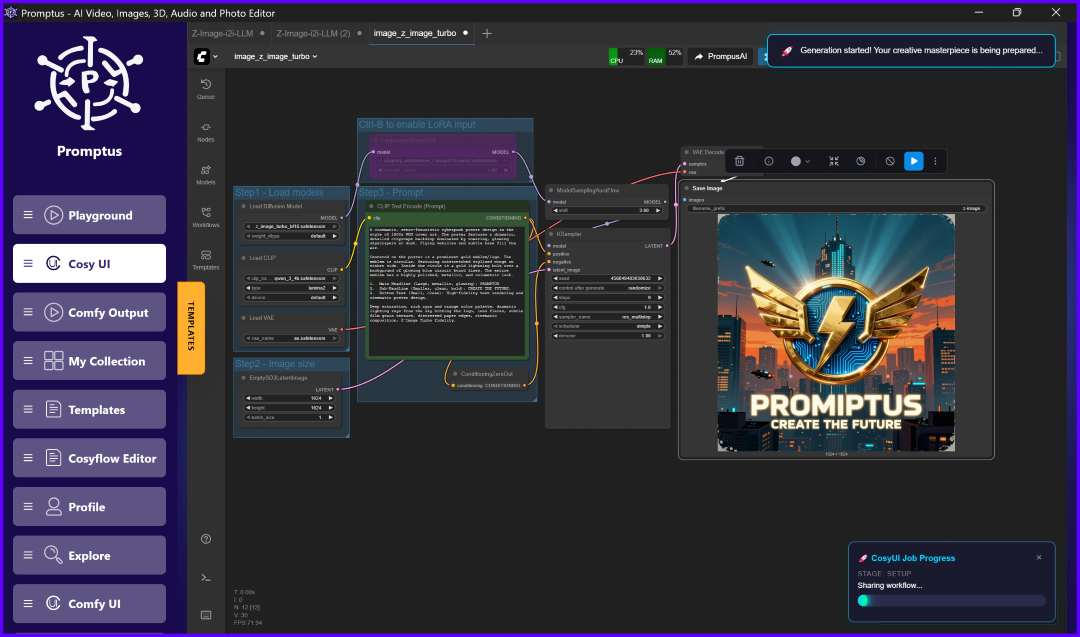
📂 2. Loading the Z-Image Workflow
Promptus includes one‑click CosyFlows templates for Z-Image:
- Z‑Image Turbo (Text‑to‑Image)
- Z‑Image Turbo (Image‑to‑Image)
- Z‑Image Turbo + LoRA Loader
- Z‑Image Turbo + ControlNet
Steps:
- Open Promptus.
- Navigate to the Workflows tab.
- Click Import Workflow and select Z‑Image Turbo.
- The visual pipeline (UNet Loader, CLIP Text Encode, KSampler, etc.) will appear on your canvas.
📥 3. Model Configuration
Promptus detects missing models and prompts you to download them automatically.
💡 Tip: Simply click "Download All Models" and Promptus will place them in the correct directories for you.
✍️ 4. Prompting & Sampling
To get the best results from the Z-Image architecture, use these optimized settings:
- Positive Prompt: "A cinematic portrait of a young woman standing in warm sunset light, shot on a 50mm lens, ultra-realistic, detailed skin texture."
- Steps: 6–9 (Z-Image Turbo is highly efficient).
- CFG: 1.0–3.0.
- Sampler/Scheduler: Euler or Euler A / Simple.
🖼️ 5. Image-to-Image (img2img) Capabilities
Transform existing visuals using the dedicated img2img workflow:
- Add your image via the Load Image node.
- Adjust Denoise Strength:
- 0.2–0.4: Subtle retouching.
- 0.5–0.7: Medium style changes.
- 0.8–1.0: Heavy transformation (e.g., Anime to Realism).
🎨 6. Using LoRAs
Enhance your style or characters by adding LoRAs:
- Add a LoRA Loader node after the UNet.
- Set strength between 0.5–1.0.
- Include specific trigger words in your positive prompt.
- Note: You can chain multiple LoRAs for combined effects.
✨ Best Practices for Success
- Keep Prompts Concise: Z-Image understands complex concepts without "prompt salad."
- Camera Styles: Use keywords like 50mm, IMAX, or Fujifilm to influence the render's "feel."
- GPU Optimization: If you experience slow renders, switch to the Promptus GPU Marketplace for high-end cloud power.
🏁 Conclusion
You are now ready to run Z-Image without a complex manual ComfyUI setup. Promptus provides the infrastructure; you provide the vision.


