
%20(2).avif)
%20transparent.avif)

How to Install and Use Infinite-You in ComfyUI: Complete Setup Guide
In this how to searies, you'll learn how to installing and using Infinite-You in ComfyUI—a powerful tool to create multiple images of yourself, others, pets, or AI characters from a single reference image.
We’ll cover everything from setup to advanced workflows, including using Promptus, a leading platform built on the open-source ComfyUI framework.
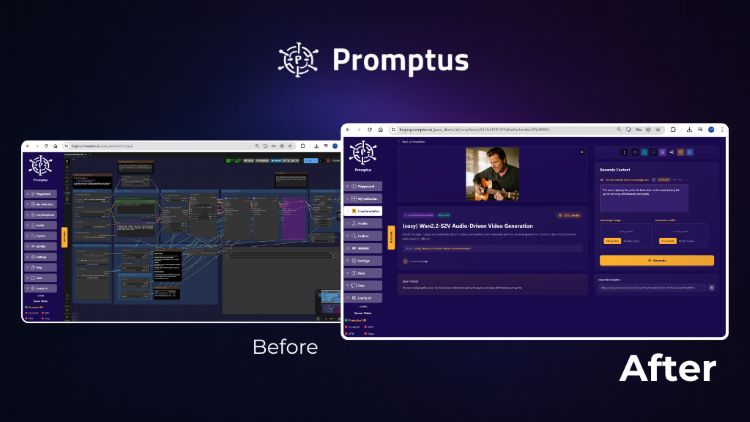
🤖 What Is Promptus ?
Before diving into installation, understand Promptus role:
- Browser-Based & Cloud-Powered: Access ComfyUI workflows via CosyFlows (no-code interface), real-time collaboration, and distributed GPU compute for faster, high-res outputs.
- Advanced Model Access: Built-in integration with models like Gemini Flash, HiDream, Hunyuan3D, Stable Diffusion, GPT-4o, and Gemini.
- Workflow Publishing & Discord Integration: Share and collaborate easily, making it popular among creative teams and solo creators.
- Multi-Modal Support: Generate text, image, and video within one platform.
- Ease of Use: Ideal for users who want ComfyUI’s power without deep technical complexity.
⚙️ Setting Up Your Environment
You can follow this tutorial on RunPod or locally (Windows, Linux, or Mac). The folder structure and steps remain consistent.
🖥️ RunPod Installation Process
- Access Template: Use the provided RunPod template link to auto-set up ComfyUI.
- Select GPU: For this guide, we use an A100 PCIe with 80GB VRAM—adjust based on availability.
- Configure Environment Variables:
- In Public Environment Variables, set required parameters (e.g., LoRA Depth, T5 Clip Model, additional Infinite-You models) to “1” for automatic downloads.
- Launch Services: Once provisioned, you’ll see:
- Jupyter Lab: File manager for uploads or manual edits.
- ComfyUI Interface: Visual workflow editor to build Infinite-You pipelines. ⚡
🗂️ Initial Setup and File Structure
- Folder Layout: The template or local repo includes folders like
models/checkpoints,custom_nodes, etc. - Accessing Files: Use Jupyter Lab (on RunPod) or your local file explorer to verify folders.
- Workflow Editor: Open ComfyUI at its localhost URL (e.g.,
localhost:8188) to build or import workflows.
🔧 Installing Infinite-You Nodes
1. Open ComfyUI Manager
- From the main interface, launch the Custom Nodes Manager.
2. Search & Install
- Search: Enter “Infinite-You” in Custom Nodes.
- Select Version: Choose “Infinite-You Human” (or relevant variant).
- Install: Click install; wait ~2–3 minutes.
- Try Fix: If installation fails, use “Try Fix” to reinstall problematic nodes.
3. Restart Interface
- After installation, restart ComfyUI when prompted and refresh the browser. 🎉
🔍 Understanding the Workflow Components
The Infinite-You pipeline involves several key elements:
1. Model Configuration
- Diffusion Model:
- Uses Flux-1-dev with FP8 E4M3 weights by default.
- Optionally swap to quantized versions to reduce GPU requirements.
- Load Node: Ensure the “Load Diffusion Model” node points to the correct model file.
2. Dual Clip Loader
- Clip Models: Requires T5-XXL-FP8 and Clip-L models.
- Formats: Supports FP16 and FP8 for memory optimization.
- Type: Set to “Flux” or matching the chosen diffusion model.
3. Text Encoding Setup
- Separate Inputs: Two text boxes (one for FP16, one for Clip-L) allow split prompting for varied results.
- Negative Prompts: Typically left empty for Flux-based workflows.
4. ID Embedding Configuration
- Automatic Download: The workflow auto-downloads required embedding models.
- Stages:
- Stage 1: Less creative—follows input face closely.
- Stage 2: More creative—allows divergence from the reference.
- Provider Settings:
- Face Analysis Provider: “Cuda”
- Face Analysis Size: “auto”
- Image Projection Tokens: Set to 8
- Model Variants:
- SIM Stage 1 & Stage 2 in FP16, BF16, or other precisions—choose based on GPU memory.
⚙️ Advanced Features and Controls
🧩 Face Control Net (Experimental)
- Current Status: Included but not fully functional for pose control.
- Intended Workflow:
- Load a control net pose or reference image.
- Extract face pose via face detector.
- Apply pose constraints to generated images.
- Workaround: Leave pose image input empty to avoid conflicts until feature matures.
🔄 Optimization Parameters
- Strength: Leave at 1.0 for standard likeness.
- Start Percent: Try ~0.10 for subtle guidance early.
- End Percent: Try ~0.90 to retain likeness while allowing changes.
- Tips: Adjust these to balance fidelity vs. creativity and experiment per reference.
▶️ Running Your First Generation
- Load Reference Image: Connect your single reference (face/person/pet) to the designated input node.
- Enter Prompts: Fill both text encoding boxes with your desired style/context prompts.
- Verify Models: Ensure diffusion, clip, and embedding models are loaded without errors.
- Queue Prompt: Click “Queue Prompt” (or equivalent) to start.
- Monitor Progress: Watch logs or previews in ComfyUI; adjust parameters if needed. 🎨
📈 Results and Quality
- Likeness Transfer: Infinite-You excels at maintaining facial features while adapting to new contexts/styles.
- Variations: Try Stage 1 for closer matches, Stage 2 for creative variations.
- Prompt Crafting: Use descriptive prompts (e.g., “portrait in cinematic lighting, vibrant colors”) to guide aesthetics.
- Batch Generation: Generate multiple outputs, then select favorites for further refinement or upscaling.
🌐 Getting Started with Promptus
- Sign Up: Visit https://www.promptus.ai and create an account.
- Access Options:
- Promptus Web: Browser-based, no local setup needed.
- Promptus App: Desktop integration for shorter latency.
- Import Workflows: Upload or recreate Infinite-You pipeline via CosyFlows (drag-and-drop).
- Distributed Compute: Leverage cloud GPUs to run heavy models without local hardware constraints.
- Collaboration: Share workflows, integrate with Discord, collaborate in real time. ✨
🛠️ Troubleshooting and Support
- Node Import Failures: Use “Try Fix” in ComfyUI Manager; ensure correct Python/environment versions.
- Model Download Issues: Check network access in RunPod or local; manually download and place model files if needed.
- GPU Memory Errors:
- Choose lower-precision variants (FP8/FP16) or smaller models.
- Use cloud GPUs (Promptus or RunPod) if local VRAM is insufficient.
- Interface Refresh: Always restart/reload ComfyUI after installing nodes or models.
- Community Help: Join Discord servers or forums for ComfyUI/Infinite-You—experienced users share tips and custom workflows. 💡
🎉 Conclusion
This guide provides the foundation for exploring Infinite-You’s capabilities within ComfyUI, on Promptus. By following these steps:
- Install the Infinite-You custom nodes
- Configure models, embeddings, and parameters
- Run your first generation with a single reference image
- Optimize via advanced settings and batch workflows
…you’ll be able to produce diverse, high-quality character images effortlessly.
Dive in, experiment with prompts and settings, and enjoy creating personalized images at scale! 🚀😁
Happy generating!


