How to Do a Hires.fix-Style Workflow in Fooocus
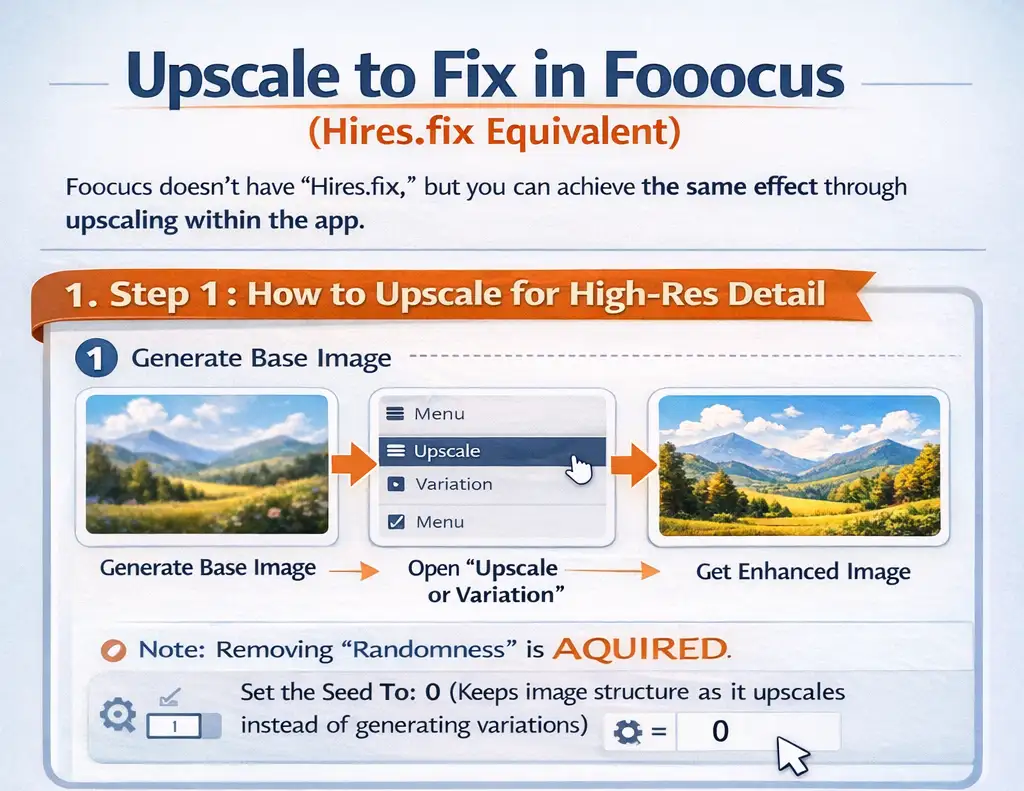
Step 1 — Generate an Image
- Open Fooocus
- Generate your image normally
- Let Fooocus choose its recommended resolution
- Do not force ultra-high resolutions (this causes blur & instability)
- Pick the best image from the batch
Why this matters:
Hires.fix (and its Fooocus equivalent) works best when the composition is already correct. Upscaling does not fix bad anatomy or framing — it refines detail.
Step 2 — Send Image to Upscale
- Click Input Image
- Drag your chosen image into:
“Upscale or Variation” - Make sure you are not in prompt-generation mode anymore
You are now refining an existing image)
Step 3 — LOCK the Image
This is where most people mess up.
- Open Advanced
- Disable randomness
- Set Seed = 0
- Turn Random OFF (if visible)
✅ This ensures:
- The image structure stays the same
- Fooocus refines instead of re-imagining
This directly matches Reddit + YouTube advice and explains why people saw unwanted changes before fixing the seed.
Step 4 — Choose the Correct Upscale Mode
✅ Recommended (Closest to Hires.fix)
- Upscale (2×)
- Non-Fast
⚠️ Avoid for Hires.fix-style refinement
- Fast 2× → acts more like a traditional upscaler
Why non-fast matters:
It performs diffusion-based refinement, closer to img2img / hires.fix behavior.
Step 5 — Generate
Use 1 Image Only
- Set Images = 1
- Click Generate
You now get:
- Higher resolution
- Sharper textures
- Cleaner edges
- Better micro-details
🎉 This is the Fooocus equivalent of Hires.fix
🧠 Pro Tips (Power Users)
🔹 Pro Tip 1 — 1.5× vs 2×
- 1.5× → subtle refinement, safer for faces
- 2× → maximum detail, riskier for artifacts
🔹 Pro Tip 2 — Faces Changing?
- Disable Enhance temporarily
- Use non-fast upscale
- Avoid prompt edits during upscale
🔹 Pro Tip 3 — Best Hires.fix Quality
- Generate base image
- Upscale 1.5× (non-fast)
- Upscale again 2× (optional)
- Stop before artifacts appear
(This mirrors multi-pass hires.fix workflows in A1111)
🔹 Pro Tip 4 — When NOT to Upscale
- Bad anatomy
- Crooked faces
- Broken hands
- Wrong composition
Fix those before upscaling.
