How To Use Flux GUF Files In ComfyUI Complete Guide
Welcome to this tutorial on implementing Flux GUF files within ComfyUI workflows. We’ll cover setup, VRAM optimization with quantized models, and advanced tips—plus how Promptus Studio Comfy (PSC) can streamline the process.
Installing the Required Components ⚙️
- Open ComfyUI Manager
- Click “Install Custom Nodes.”
- Search for GUF and install the “ComfyUI GUF” custom node.
- After installation, refresh or reboot ComfyUI to activate the node.
- Access GitHub Resources
- The manager’s linked GitHub repo provides:
- Direct links to Flux model GUF files.
- T5XXL encoder model files on Hugging Face with various compression levels.
- Choose files based on your VRAM capacity. 🔗
- The manager’s linked GitHub repo provides:
Understanding Model File Options 📂
- Compression Levels:
- T5XXL encoder: Q3–Q8, plus float16/float32.
- Flux1_dev or Schnell GUF: different sizes/precision.
- Recommendations:
- Start with at least Q5 for a balance of quality and VRAM usage; experiment per system.
- File Placement:
- T5XXL GUF → place in
models/clipdirectory. - Flux1_dev / Schnell GUF → place in
models/unetdirectory.
- T5XXL GUF → place in
Setting Up Your Workflow 🔧
- Close Manager and return to the main ComfyUI interface.
- Add Custom Nodes:
- Search for “GUF” to find:
- UNet loader for GUF node.
- Dual Clip Loader custom node.
- Search for “GUF” to find:
- Remove Existing Checkpoints:
- Delete any default “Load Checkpoint” nodes to avoid conflicts.
- Configure Clip Loader:
- Set clip name to one of the T5 models you placed.
- Set type to Flux and select your Flux dev model (e.g., quantized version).
- For testing, use more compressed files to gauge performance impact.
Configuring Generation Parameters 🎛️
- Negative Prompts: Remove or leave empty—Flux GUF doesn’t support negative prompts effectively.
- Latent Space / Resolution: Set to 1024×1024 for high-res output.
- CFG Scale: Use a CFG value of 1 for straightforward guidance.
- Sampler:
- Euler sampling works well generally.
- Switch to “simple” sampling if you prefer minimal complexity.
- KSampler Connection: Ensure your Flux model node is connected to the KSampler.
- VAE Loader:
- Add a VAE loader node using the AE safetensors file provided by Flux team for compatible decoding.
Performance Considerations and Results 💪
- VRAM Usage:
- Quantized Q2 model uses ~7.7–7.8 GB during generation, leaving ~4 GB for extras (ControlNets, IP Adapter, LoRAs).
- Significant reduction vs. full-precision models.
- Generation Time:
- For 20 steps at 1024×1024, expect ~1 minute 26 seconds (varies by GPU).
- Flux’s complexity means slower runs, but quality often justifies time.
- Quality:
- Excellent spatial awareness and prompt adherence, even at high compression.
- Test different compression levels to find the sweet spot between speed and fidelity.
Testing Complex Prompts 🧪
- Purpose: Validate spatial understanding and object recognition.
- Example Prompt:
“A photo of a green pyramid block next to a red circle block. Behind the blocks is a wooden chair.”
- Observation:
- Quantized GUF often maintains accurate positioning and coherent rendering.
- Even Q2 can correctly interpret spatial relationships if placed and prompted well.
- Tip: Iterate on prompt phrasing and test multiple runs to confirm consistency.
Advanced Usage Tips ✨
- Schnell Versions:
- If VRAM is extremely limited, try Schnell GUF versions for more compression.
- Resource Allocation:
- Quantized models free VRAM for extra nodes (e.g., ControlNet once available).
- Batch vs. Single:
- Run smaller batches when testing new prompts; upscale selected outputs separately.
- Promptus Integration:
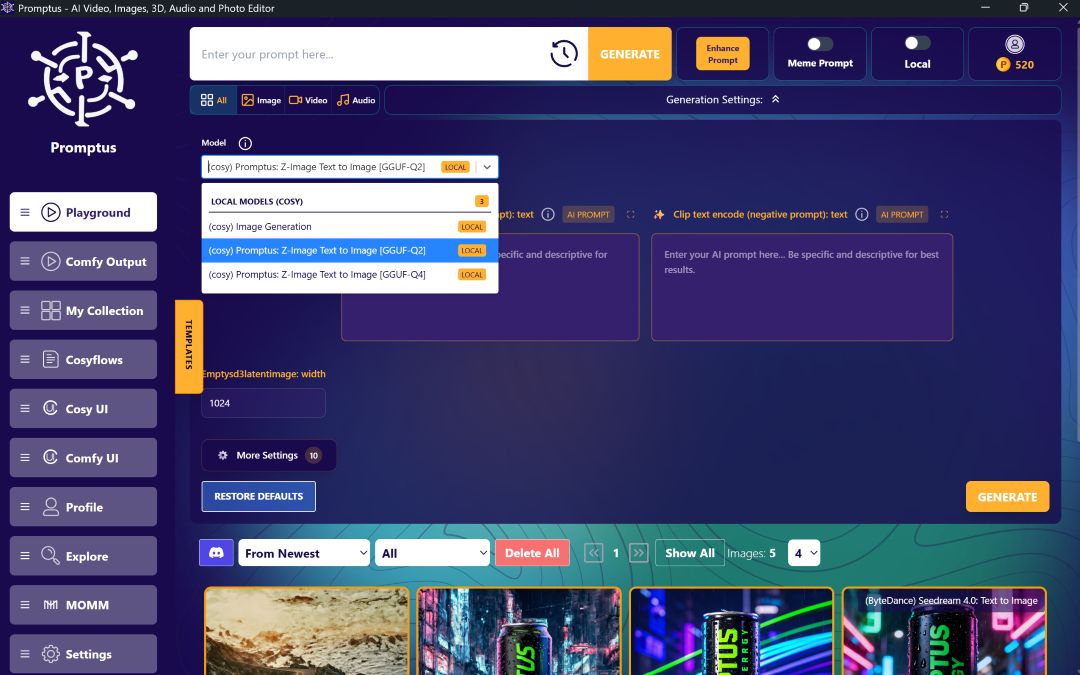
- For users wanting minimal local setup, PSC offers drag-and-drop CosyFlows with GUF workflows pre-configured or importable.
Getting Started with Promptus Studio Comfy 🌐
- Sign Up: Visit https://www.promptus.ai and create an account.
- Access Options:
- Promptus Web for browser-based usage.
- Promptus App for desktop integration.
- Import GUF Workflows:
- Use CosyFlows to recreate or upload your Flux GUF pipeline.
- Cloud GPU Compute:
- Offload heavy generation to distributed GPUs—no local VRAM worries.
- Collaboration & Publishing:
- Share GUF-based workflows via Discord integration and real-time collaboration features. 🚀
Conclusion 🎉
Implementing Flux GUF files in ComfyUI unlocks powerful, VRAM-efficient image generation. By:
- Installing the GUF custom node,
- Placing quantized files correctly,
- Configuring sampler/CFG/latent settings,
- Testing compression levels for performance vs. quality,
…you can achieve high-quality results on varied hardware.
For an even smoother experience, leverage Promptus Studio Comfy’s cloud workflows, intuitive interface, and collaboration tools. Whether creating branded visuals, concept art, or experimental scenes, Flux GUF in ComfyUI makes advanced AI generation accessible and efficient. ✨ Happy experimenting!
Written by:
Jack
A professional photographer captivated by Promptus, Jack integrates AI into his workflow to elevate his craft. He views AI as an invaluable tool and plans to continue leveraging its capabilities in his career.
Try Promptus Cosy UI today for free.
%20(2).avif)
%20transparent.avif)


